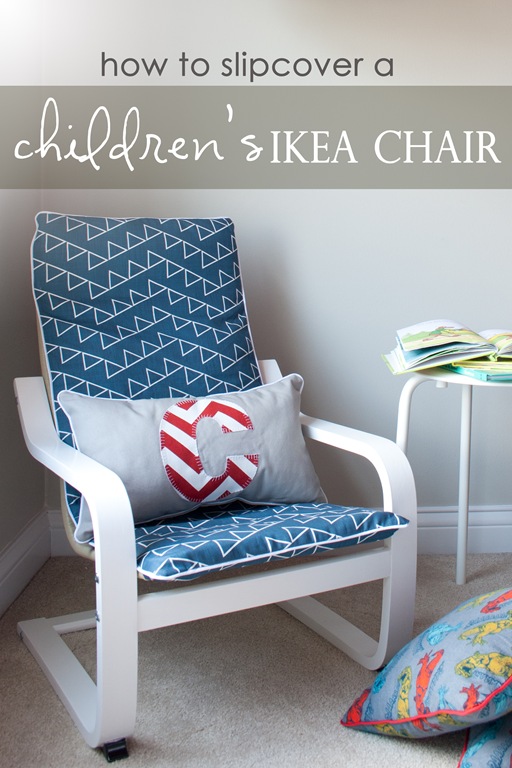
How to Slipcover a Childrens IKEA POANG Chair
First off, a huge THANK-YOU to all of you who have left me such wonderful comments on Carson’s Room Makeover! As a blogger, we work so hard on projects, taking pictures & writing posts for very little in return, but when I hear that something I created inspired YOU, well that makes it all worth it in my book:) SO again, thanks from the bottom of my heart for your kind words and praise.
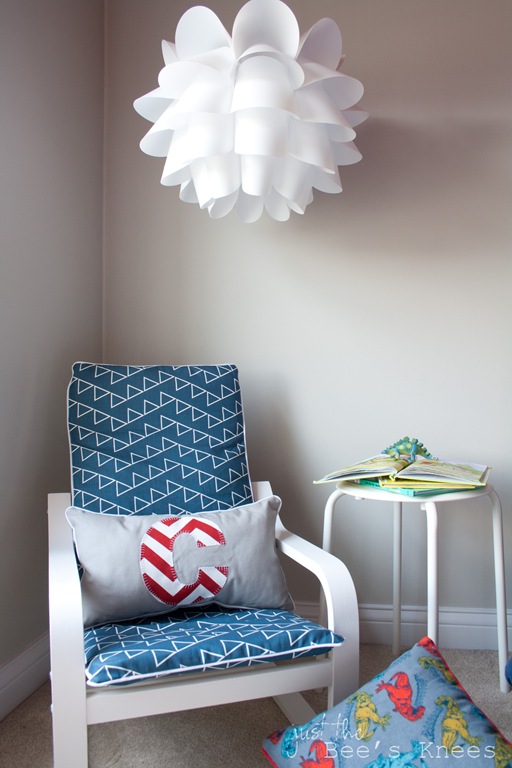
Now that the big reveal is over, I’m going to be sharing a few of the DIY projects with you over the course of the next couple of weeks. The first is how I made over the ever so popular (but slightly boring) IKEA POANG chair for kids by painting the frame and adding a new slipcover with fabric from New Mom Designs. For a little effort you can turn this chair into a one of a kind custom chair that is also budget friendly.
In case you have never seen a Children’s POANG chair, this it what it looks like when you buy it:
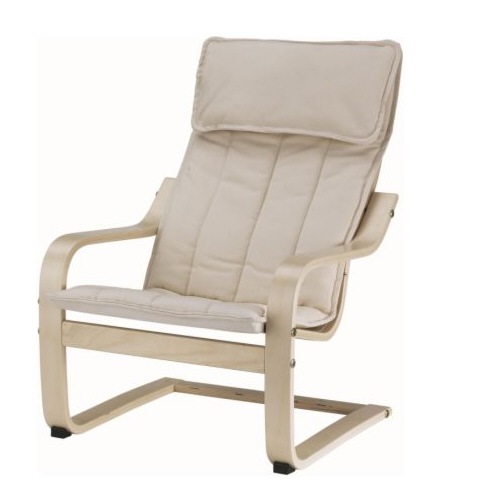
Very cute chair, but the color scheme just didn't work well in Carson's room. At only $29.99, its a steal and I knew that I could make it look fabulous with some inexpensive fabric & paint. After sanding and painting the frame white, I then made a slipcover using some fun fabric I discovered from New Mom designs.
MATERIALS NEEDED:
1 yard of fabric (use a medium – heavy weight fabric)
9 yards of coordinating piping/cording
Strip of sew-on Velcro approximately 3/4” W x 12”L
Coordinating thread
STEP #1: Remove head rest from cushion.
I decided that I didn't want to have the head rest on my cushion, so using a seam ripper, I carefully removed it from the main cushion. It was just basted on, so it came apart very easily.


STEP #2: Cut front & back panels
Measure the cushion. Cut 2 panels from your fabric that are 1” wider and 1” longer than the actual cushion. For example, my cushion was 15”W x 34.5” L, so I cut 2 panels that were 16”W x 35.5”L. (This is to leave 1/2” seam allowances for all sides)

STEP #3: Attach Piping
Pin piping all around the edge of the right side of the top panel. You can use or make any cording/piping you like. I chose to use Wrights 1/2" Bias Tape Maxi Piping in White .

Here’s a few tips for sewing piping:
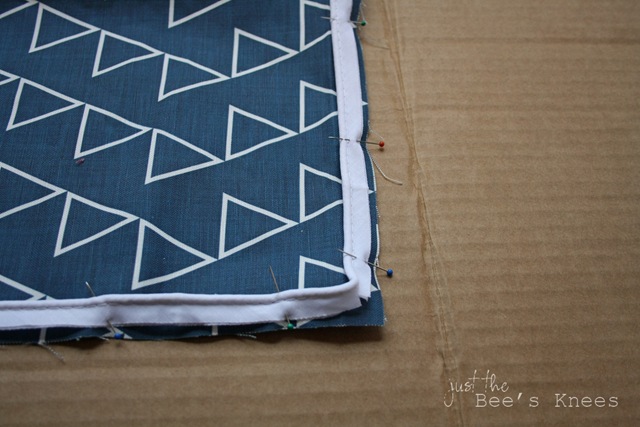
When you get to the corner, cut a small slit just up to the stitching to easily wrap around corners.
To join the ends of the piping together, cut the end about 1” longer than needed, then remove stitches to expose cording using a seam ripper. Cut exposed coring so it butts up exactly with the other end. Fold under fabric of loose end, then tuck other end inside and pin.

3. Once the piping is all pinned on, sew it to the top panel using your zipper foot. Stitch directly on top of or as close as you can get to the existing stitching on your piping.
Now that the top panel is done, lets move on to the back. This is what the back of the existing cushion looks like: A pocket at the top to slip on over the frame, then a pocket at the bottom with a strip of Velcro that slips over the bottom of the chair frame. (The Velcro helps secure the cushion to the frame.)
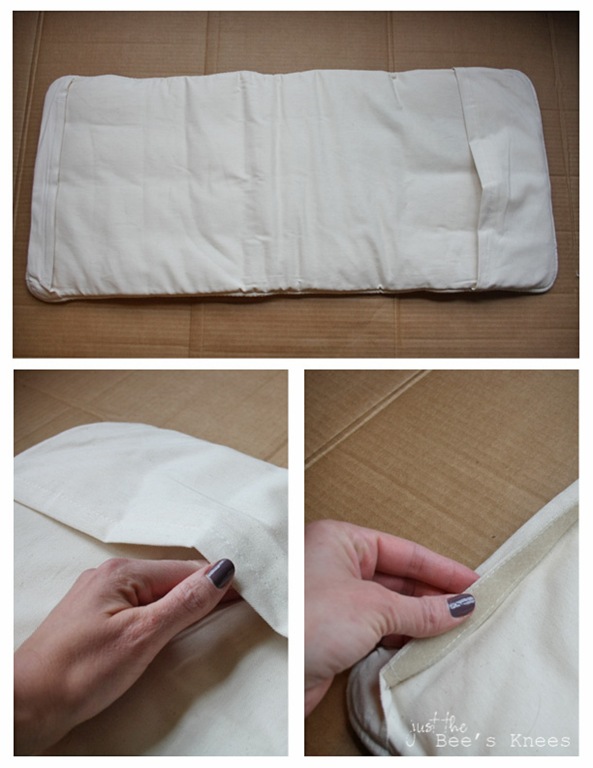
Our goal is to re-create these pockets on our slipcover so the cushion is installed and secured the same way as the original.
Step #4: Make top & bottom pockets for back panel
Cut the pieces for the pockets. Measure your pockets on the back and add 1” to the width and 2” to the length. My top pocket panel was cut 16” W x 8”L and my bottom pocket was 16”W x 4.5”L. (The width should be the same as the front & back panel). Once they are cut, you are going to fold & press under the top of each pocket 1/2”, then 1” again so each pocket piece will resemble the photos below.
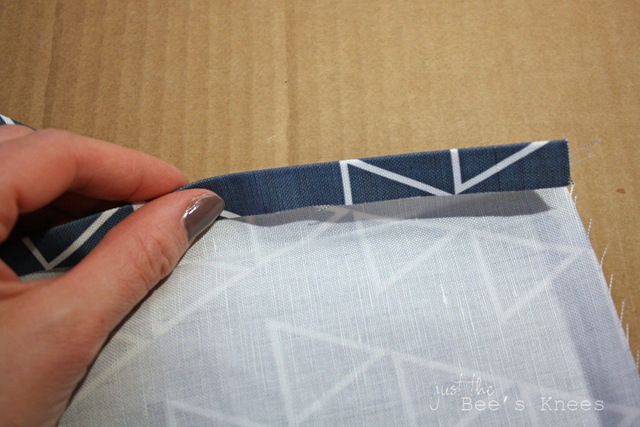

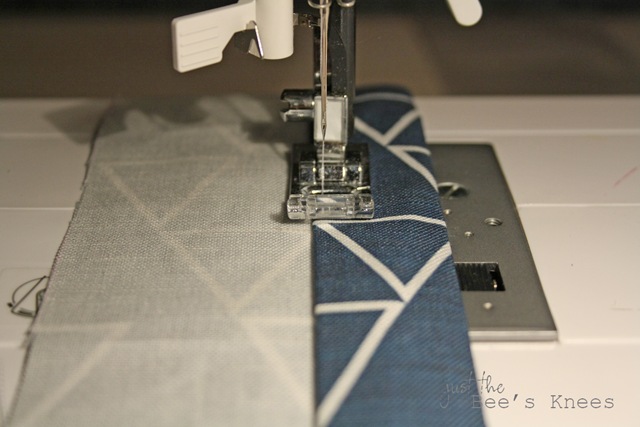
Once they are pressed, stitch along the edge to secure. On the top of the bottom pocket, stitch on a piece of the Velcro the same size as the existing Velcro on the seat frame. (Just make sure you use the opposite of what is already on the chair so the Velcro will hold together! For ex. if the chair has the loop side, sew on the hook side to the fabric)

Step #5: Sew together the top and bottom panels:
Place the top panel (with the piping attached) right side up on a flat surface. Pin the top and bottom pocket on with right sides together.
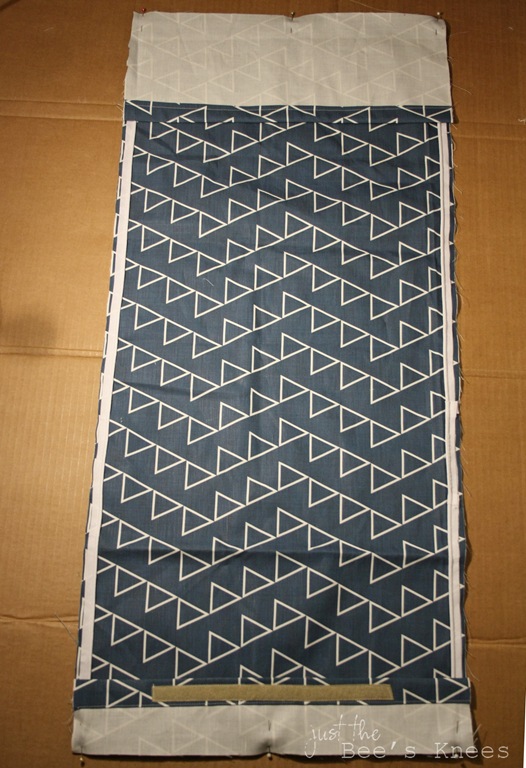
For the back panel, you are first going to fold & press under the top edge 1” then one 1” again. Lay the back panel on top of the front panel right sides together lining up the bottom edges. (Notice that the top edge of the back panel does not line up with the top edge of the front panel. This is so a hole is created and we can turn the cover inside out and insert the cushion.) Pin.

Now we are ready to sew the panels together! Using your zipper foot, stitch the panels together by stitching directly on top of the stitching from the piping.

Once you are done sewing, clip your corners, turn the cover inside out and slip the cushion inside using the hole we created under the top pocket. Secure the cover to the chair and you are done! Now you have a custom looking chair for your little one at a fraction of the cost.

If you want to check out the rest of Carson’s Room, click here!

you may also like....
Hi! I'm Sarah
By combining style + function, I can help you create a home for your family that is both lovely and livable.


